6 channel Remote Control (Part 2)
I replace the LCD to the smaller 1.3" OLED, that way I can reduce the size of the transmitter 😉. More compact compare to the previous attempt here.

Back to drawing board, this time I design it in opposite direction. I define which channel use for which purpose. However, I still want to have some kind of flexibility. Thus I introduce transmitter mode selection where you can select the target device you want to control, such as car, plane, delta wing, quadcopter, etc.

Address trimming setting and channel reverse setting

This is the idle screen look like, in picture below the remote was set to PLANE-A which is single servo aileron. As you can see it is telling you to connect CH1 as throttle, CH2 as rudder, CH3 as elevator and CH4 as aileron.

I found out that quality of the joystick bought from Aliexpres is not that good. As you can see from the picture, CH3 at idle suppose to be around 127 (5K ohm) after mapping but it was map as 119 which mean the resistance and center is below 5K ohm. Also the minimum value is not 0 (0 ohm) but 60 and max value is not 255 (10K ohm) but 246. I have to adjust the code to compensate these variation.
I also discovered some weird behavior, the Arduino Nano randomly hang after a while. Sometime hang within a minutes but sometime take more than an hour 😖. I had review my code couples of time, I didn't not see anything that can cause it to hang 😭.
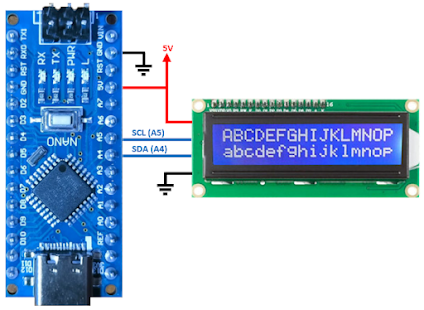
I thought it was because of the menu code, I added a lots of "CASE" and "IF then ELSE" maybe it cause infinite loop somewhere. I commented all the code related to the menu but it does not help, it is still occasionally hang. Somehow, by luck, I discovered that it immediately hang when I touch the I2C line to the LCD 😱 and stay hang even after I remove my finger 😭. I will make separate post for this failure.


Comments
Post a Comment